Can You Really Get Measured Without Visiting a Tailor?
Short answer: yes. And millions of people already do it every year.
Here is the thing most tailoring shops do not lead with. The measurements themselves are not complicated. A tailor is not using some mystical sixth sense when they wrap a tape around your chest -- they are reading a number off a strip of fabric. In fact, the way those numbers get taken is standardized in published industry tables: ASTM International maintains body-measurement standards for menswear (the D8241 table covers young men, sizes 32-48), so manufacturers can cut patterns to documented anthropometric data rather than to opinion.12 The tape numbers are objective. The skill of tailoring is in the cutting and sewing -- and in deciding how much ease to layer on top of the number -- not in holding the tape measure.
I am Jay, and at Nathan Tailors in Hoi An, Vietnam, we have guided many hundreds of remote customers through self-measurement over video call, Telegram, and with our free online Guided Measurement App that walks you through every step with photos. We get fit right the large majority of the time on the first try -- and when we do not, we adjust. That is not magic. It is a clear process, good instructions, and a team that checks your numbers before a single piece of fabric gets cut.
Why does this matter so much? Because fit is the single biggest reason clothes get returned. In 3DLOOK's analysis, size was "by far the biggest cause" of apparel ecommerce returns -- the US apparel return rate is about 20.8%, online clothing returns reach roughly 30%, and for menswear about 23% of returns happen because the item fit too small.4 Read that the right way and self-measurement stops being a chore. It is the highest-leverage thing you can do as a remote buyer: get the tape right once, and you skip the returns lottery entirely.
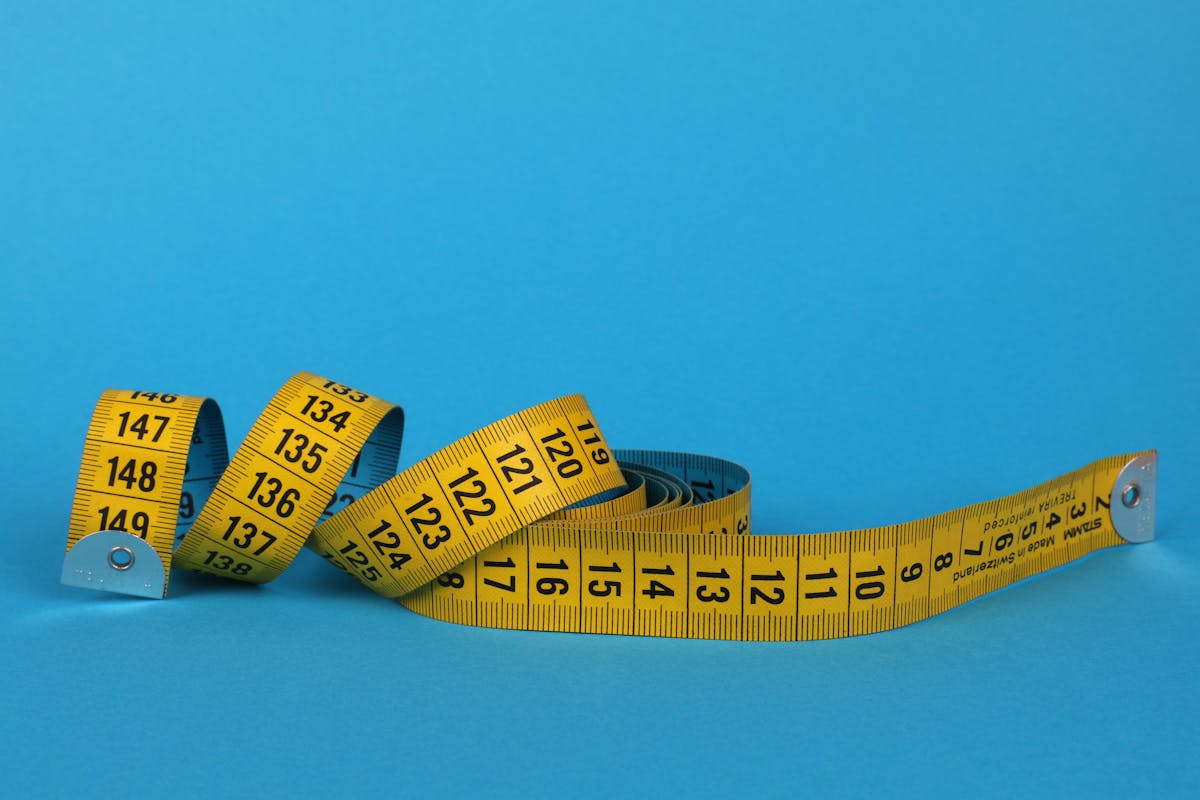
This guide walks you through every measurement you need, step by step. Grab a flexible tape measure (the soft kind, not a metal construction tape), a friend if possible, and about fifteen minutes.
What You Will Need

- A soft fabric tape measure -- the cloth kind used by tailors. If you do not have one, you can pick one up cheaply on Amazon. Then open our Guided Measurement App and it walks you through every measurement step-by-step with photos.
- A well-fitting t-shirt or thin shirt -- wear something snug so the tape sits close to your body, not over a bulky sweater.
- A mirror or a helper -- some measurements are easier with a second pair of hands, but all of them can be done solo with a mirror.
- A pen and paper (or your phone) -- write each number down immediately. Do not try to remember them all.
The 9 Measurements You Need for a Custom Suit
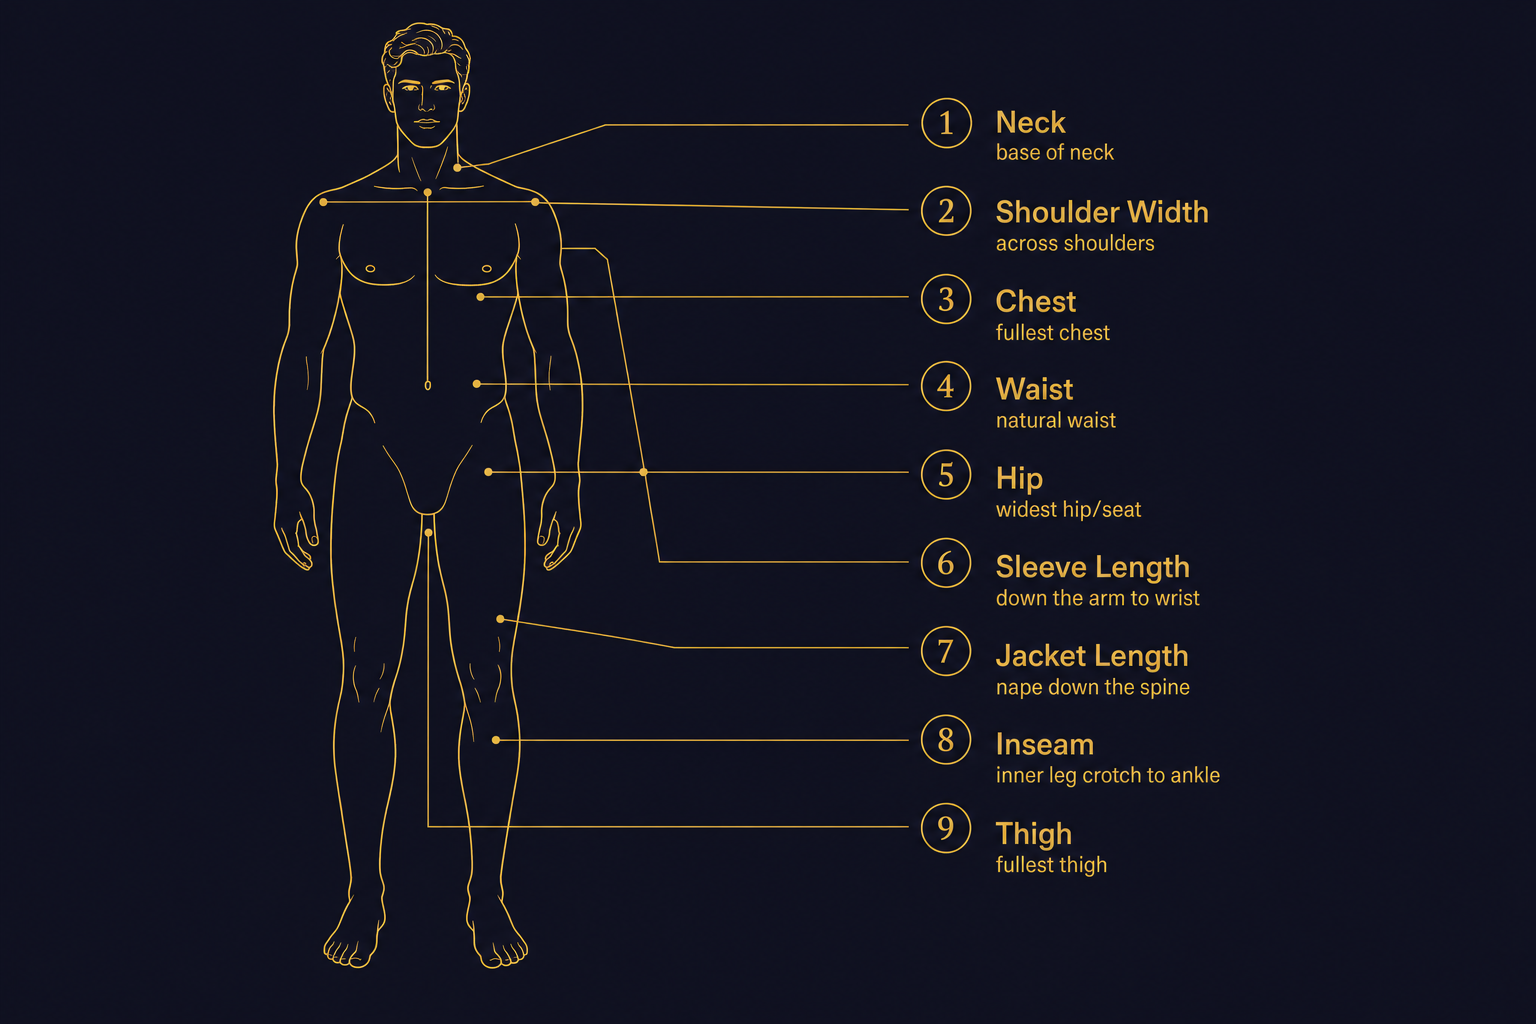
Below are the nine key measurements, in the order we recommend taking them. We start at the top of the body and work down. Each section includes what the measurement is, how to take it, and the most common mistake people make.
1. Neck
What it is: The circumference around the base of your neck, where a dress shirt collar would sit.
How to take it:
- Stand up straight and look forward. Do not tilt your chin up or down.
- Wrap the tape measure around the base of your neck, just above where your collar bones meet.
- Keep the tape snug but not tight. You should be able to slide one finger between the tape and your skin.
- Read the number where the tape meets the starting end.
Common mistake: Pulling the tape too tight. Your neck measurement should feel comfortable, not choking. If you pull it tight, your finished shirt collar will strangle you every time you sit down or look to the side.
2. Shoulder Width
What it is: The distance from the tip of one shoulder to the tip of the other, measured across your upper back.
How to take it:
- Stand naturally with your arms relaxed at your sides.
- Feel for the bony point at the very tip of each shoulder -- the spot where your arm meets your shoulder. If you are wearing a well-fitting t-shirt, the seam usually sits right at this point.
- Place the tape on one shoulder tip, run it across your upper back (not over your neck), and read the number at the other shoulder tip. This is the standard tip-to-tip method menswear retailers use.6
Common mistake: Measuring too far down the arm. You want the point where the shoulder ends and the arm begins, not an inch down your bicep. If your measurement seems unusually wide, you have probably gone too far.
Solo tip: This one is tricky alone. Use a mirror behind you, or try this workaround: measure from the base of your neck to one shoulder tip, then double it. It will not be as precise, but it gets you in the right range, and our tailors will cross-check this against your chest measurement anyway.
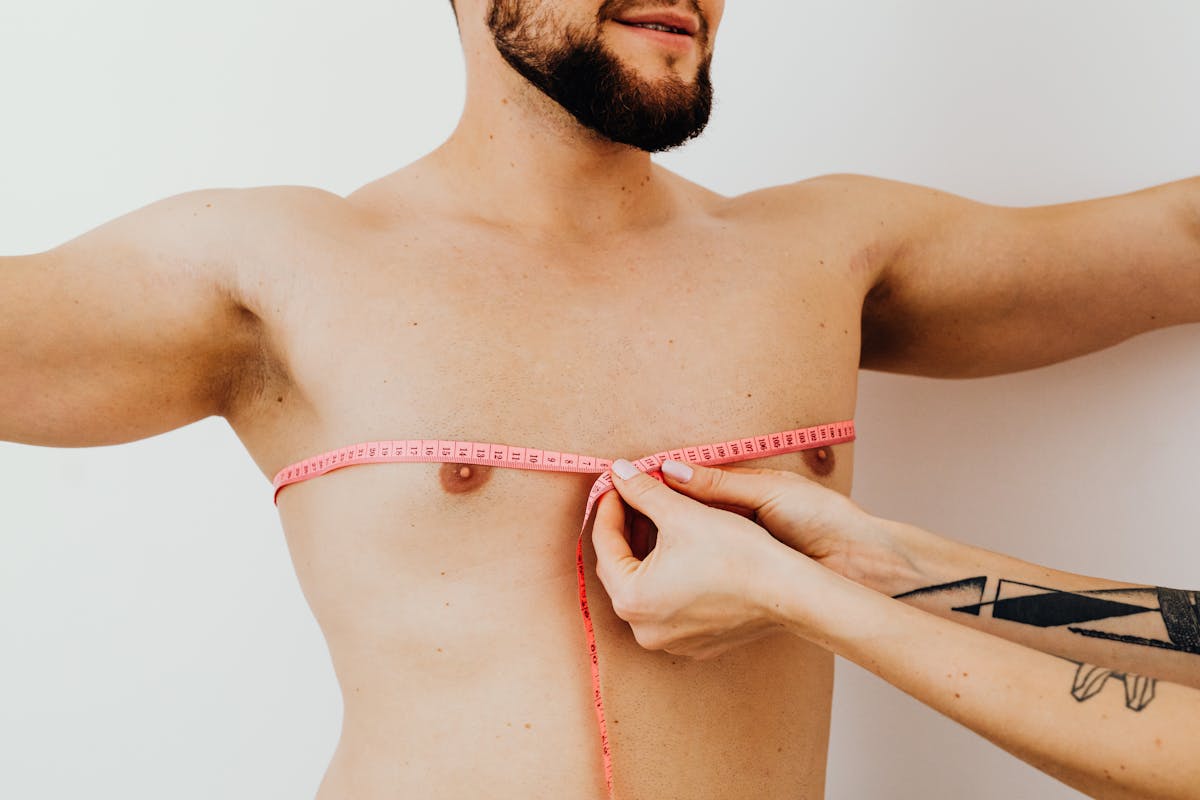
3. Chest
What it is: The circumference around the fullest part of your chest, usually right at nipple level.
How to take it:
- Stand with your arms relaxed at your sides (not puffed out, not squeezed in).
- Wrap the tape around the fullest part of your chest, passing under your armpits and across your shoulder blades in the back. Generation Tux describes the identical technique: fullest part, under the armpits, across the shoulder blades, snug but not tight.6
- Make sure the tape is level all the way around -- not dipping down in the back or riding up in the front.
- Breathe normally. Take the measurement mid-breath, not while holding your breath or exhaling completely.
Common mistake: Sucking in or puffing out your chest. We need your real measurement, not your aspirational one. The suit has to fit the body you have right now. If you suck in, the jacket will pull and crease across the chest every time you relax.
See our visual chest measurement guide with photos.
4. Waist
What it is: The circumference around your natural waist -- the narrowest part of your torso, usually about an inch above your belly button.
How to take it:
- Find your natural waist by leaning to one side. The crease that forms is your natural waistline.
- Wrap the tape around this point, keeping it parallel to the floor.
- Do not suck in your stomach. Stand relaxed.
- The tape should be snug but not compressing your skin. You should be able to slide a finger underneath.
Common mistake: Measuring at your belt line instead of your natural waist. Many men wear their pants below their natural waist, sometimes by several inches. Your belt line and your natural waist are usually different. For suit trousers, we need both -- but the waist measurement here is for the jacket.
See our visual waist measurement guide.
5. Hip
What it is: The circumference around the widest part of your hips and seat.
How to take it:
- Stand with your feet together.
- Wrap the tape around the widest part of your hips and buttocks. This is usually about 7 to 9 inches below your natural waist.
- Keep the tape level all the way around.
Common mistake: Measuring too high. The hip measurement should capture the widest point, which for most people is right around the fullest part of the buttocks. If you measure at the hip bones, you will miss the actual widest point and your trousers will be too tight in the seat.
See our visual hip measurement guide.
6. Sleeve Length
What it is: The length from the tip of your shoulder, down your arm, to your wrist bone.
How to take it:
- Bend your arm slightly -- about a 15-degree bend at the elbow. Do not hold your arm straight like a robot. Generation Tux, a national menswear retailer, gives the same instruction: measure with a slight bend in the elbow, never a perfectly straight arm, from the shoulder end down to the wrist bone with a flexible tape.5 A slight bend gives you room to move in the finished jacket.
- Place the tape at the tip of your shoulder (same bony point you found for the shoulder width measurement).
- Run the tape down the outside of your arm, following the natural curve over your elbow, all the way down to your wrist bone.
Common mistake: Measuring with a fully extended arm. Your arm is almost never completely straight in real life. If you measure with a straight arm, your sleeves will ride up every time you bend your elbow -- which is basically always.
See our visual sleeve measurement guide.
7. Jacket Length
What it is: The length from the base of your collar (where your neck meets your shoulders in the back) down to where you want the jacket to end.
How to take it:
- Stand up straight.
- Have someone place the tape at the most prominent bone at the base of your neck (the vertebra that sticks out when you tilt your head forward).
- Run the tape straight down your spine to the point where you want the jacket to end.
Rule of thumb: A classic suit jacket should cover your seat. A quick test: let your arms hang at your sides and curl your fingers. The bottom of the jacket should rest right around where your fingers curl. For most men, the jacket length falls between 29 and 33 inches.
Common mistake: Making the jacket too short. Modern slim-fit trends have pushed jacket lengths shorter, but going too short throws off the proportions and makes your legs look shorter. When in doubt, go with the curled-finger test.
8. Inseam (How to Measure Your Inseam)
What it is: The length from your crotch to the bottom of your ankle bone, along the inside of your leg.
Easiest method (measure a trouser you already own): Most people measure alone, so start here. Take a pair of trousers that fit you well in length, lay them flat on a hard surface, and measure straight from the crotch seam down to the hem along the inseam. Generation Tux confirms this is the standard approach: use a well-fitting pair of trousers and measure the inner leg straight down.6 It is surprisingly accurate and removes the awkwardness of measuring your own inner leg.
On-the-body method (if you have a helper):
- Stand with your feet about shoulder-width apart.
- Have someone place the end of the tape at the highest point of your inner thigh (right at the crotch seam where your trousers would sit).
- Run the tape straight down the inside of your leg to your ankle bone, or to where you want your trouser hem to fall.
Common mistake: Not standing up straight, or bending the knee of the leg being measured. Both will give you a shorter inseam than reality, and your finished trousers will look like you are expecting a flood.
See our visual inseam measurement guide.
9. Thigh
What it is: The circumference around the fullest part of your thigh.
How to take it:
- Stand with your weight evenly distributed on both legs.
- Wrap the tape around the fullest part of one thigh, usually right below the crotch, about 1 to 2 inches down.
- Keep the tape level and snug, but not squeezing.
Common mistake: Flexing your thigh muscles. Relax. You need to sit down in these trousers, and your thighs spread when you sit. We already add ease to the measurement -- you do not need to add more by flexing.
See our visual thigh measurement guide.
Your Measurements Checklist

Here is every measurement in one place. Take them in order and write each number down before moving on.
| Measurement | Your Number | Where to Measure |
|---|---|---|
| Neck | _____ inches / cm | Base of neck, one-finger gap |
| Shoulder Width | _____ inches / cm | Tip to tip across upper back |
| Chest | _____ inches / cm | Fullest part, under armpits |
| Waist | _____ inches / cm | Natural waist, above belly button |
| Hip | _____ inches / cm | Widest point of hips and seat |
| Sleeve Length | _____ inches / cm | Shoulder tip to wrist, arm slightly bent |
| Jacket Length | _____ inches / cm | Base of neck to bottom of jacket |
| Inseam | _____ inches / cm | Crotch to ankle along inner leg |
| Thigh | _____ inches / cm | Fullest part of thigh |
5 Tips for Getting Accurate Measurements at Home
- Measure twice, write once. Take each measurement at least twice. If the two numbers differ by more than half an inch, take a third and go with the two that match.
- Wear thin clothing. A tight t-shirt and light trousers. No hoodies, no jeans, no belts. (Generation Tux recommends a form-fitting tee for exactly this reason.6)
- Stand naturally. Do not straighten up like you are in the military. Stand the way you actually stand when you are waiting in line for coffee. That is the posture your suit needs to fit.
- Keep the tape level. The single biggest source of error is a tape that dips in the back or rides up in the front. Use a mirror to check, or ask your helper to eyeball it.
- Measure in the units you are comfortable with. Inches or centimeters -- either works. Just be consistent. Do not switch between the two mid-measurement.
What Nathan Tailors Does Differently
Look, we could just tell you to send your numbers and hope for the best. But that is not how we work. Here is what actually happens when you order from us remotely:
Free Guided Measurement App
Head to our Guided Measurement App. It walks you through every measurement step-by-step with photos showing exactly where to place the tape, how tight to pull it, and how to record the number. All you need on your end is any soft tape measure -- if you do not have one, a cheap cloth tape measure from Amazon is perfect.
Free Video Measurement Call
Not sure you trust yourself? We get it. Book a free 15-minute Telegram video call with one of our team members. They will walk you through every single measurement in real time, watching through the camera to make sure your tape is level and in the right spot. It is the next best thing to being in our Hoi An shop. Start in the Guided Measurement App and message us on Telegram to book the call.
Telegram Support Throughout
After you send your measurements, our tailors review every number before cutting anything. If something looks off -- say, a 44-inch chest with a 28-inch waist, which is possible but unusual -- we will message you on Telegram to double-check. We catch errors before they become problems.
Cross-Referencing Against Real Data
Our tailors do not just blindly follow your numbers. They cross-reference each measurement against the others to make sure the proportions make sense. This is not a quirk -- it is the same logic that drives modern sizing. Body shapes vary so widely that anthropometric surveys now rebuild sizing from scratch: the SizeUSA study 3D-scanned more than 10,000 people across 12 US cities, and scanners pull 200-plus measurements from each body.3 No single number tells the whole story. So before we cut, we check your numbers against each other and against the many body types we have made for already.
A tape reading is a fact. The craft is everything you do with it before the scissors touch the cloth.

Why Remote Measurement Works Better Than You Think

There is a persistent myth that you absolutely must stand in a tailor's shop to get a good fit. Let me break down why that is outdated thinking.
A traditional tailor in London, New York, or Sydney sees maybe 5 to 15 customers a week. They are good at their craft, but they are working with a relatively small sample size. Our tailors in Hoi An work with dozens of customers per day. They have seen a huge range of body types, proportions, and edge cases. When your measurements come in, they are not guessing -- they are pattern-matching against years of previous orders.
That volume is also why we can offer custom tailored suits at a fraction of western prices. It is not because the quality is lower. It is because our tailors are busy, our overhead is low, and we are not paying London rent. Simple economics. When you are ready to build one, you can browse the cloth in our fabric catalog and see exactly what you are choosing before we cut.
The combination of your self-measurements, our verification process, and our tailors' experience produces results that consistently match or beat the experience of standing in a western tailor shop -- at roughly one-fifth the price.
What If My Measurements Are Wrong?

First: our review process catches most errors before cutting begins. But if something does slip through, we have your back. Nathan Tailors offers adjustments on all orders. If the fit is not right, we work with you to fix it. That is part of the service.
The reality is that even in-person tailoring sometimes requires adjustments. The difference is that a western tailor charges you $80 to $150 for alterations on top of the $2,000 you already paid for the suit. We build adjustment support into our process because we know remote ordering requires that extra layer of confidence. (Our own two-piece suits start at $149, so the comparison is not subtle.)
Frequently Asked Questions
How do I measure my inseam?
The easiest method is to measure a pair of trousers you already own that fit well in length: lay them flat and measure from the crotch seam straight down to the hem along the inner leg. This is the standard approach menswear retailers recommend.6 To measure on the body instead, have a helper place the tape at the top of your inner thigh (the crotch seam) and run it straight down to your ankle bone while you stand up straight with feet shoulder-width apart.
What is the difference between natural waist and belt line?
Your natural waist is the narrowest part of your torso, usually about an inch above your belly button -- it is where a suit jacket nips in and where classic trousers sit. Your belt line is wherever you personally wear your pants, which for many men is several inches lower, around the hips. They are usually different numbers, so for a custom suit we want both: the natural waist informs the jacket, and the trouser waist matches where you actually wear them.
Can I measure myself accurately without a tailor?
Yes. Body measurements follow a defined, published procedure -- ASTM's apparel-sizing standards specify the tape, posture, and clothing to use12 -- so self-measurement is a repeatable process, not a guess. The two things that make it reliable are technique (soft tape, thin clothing, stand naturally, keep the tape level) and a second set of eyes to verify. That is why our Guided Measurement App and free video call exist: you take the numbers, and our tailors confirm the proportions before anything is cut.
Ready to Get Started?
You now have everything you need to measure yourself accurately at home. Here is what to do next:
- Take your measurements using the checklist above.
- Visit our interactive measurement guide for visual references and photos of each measurement.
- Book a free appointment -- whether that is a video measurement call, a Telegram consultation, or a visit to our Hoi An shop.
- Send us your measurements and we will take it from there.
Custom tailoring should not be complicated. And it definitely should not cost what western tailors charge. You have the tape measure. You have the instructions -- the same ones the sizing standards are built on. And you have a team in Hoi An ready to make sure every number is right before we cut a single thread. Browse the fabric catalog or start the measurement app whenever you are ready.
The only question left is: what kind of suit are you building?